| g e n u i n e i d e a s | ||||||
 |
 |
 |
 |
 |
 |
 |
| home | art and science |
writings | biography | food | inventions | search |
| winging it |
|
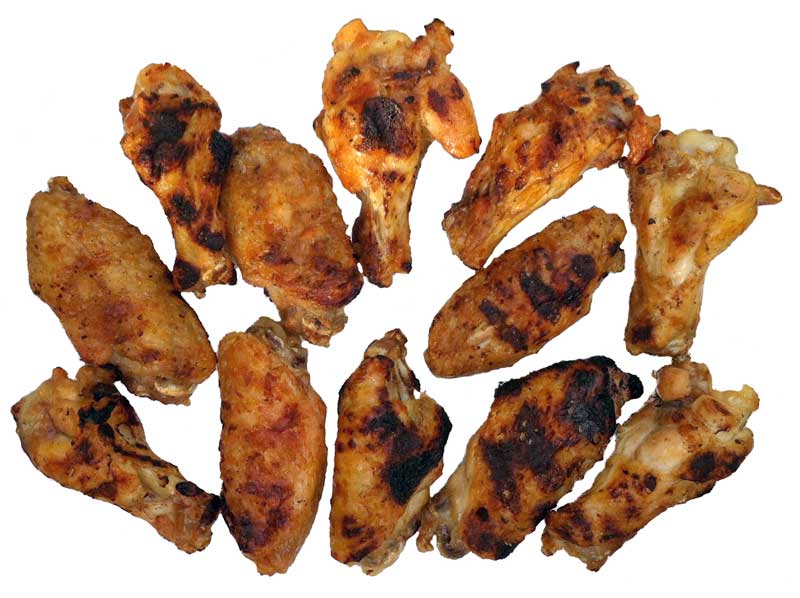
May 2012 Many foods go from trash to table as food tastes evolve. In colonial times, lobster was a poor man's fare, served to slaves and apprentices alike so frequently, that lobster riots often broke out. And chicken wings, with their high ratio of bone+skin to meat also languished, until the "invention" (or at least popularization) of Buffalo Wings in the 1960's. In most restaurants, wings are deep-fried to crispy goodness, then tossed in sauce. Few cooking techniques can match deep frying for this task- the intense surface contact of hot oil penetrates every nook and cranny, uniformly rending out chicken fat. It cooks so rapidly, steam pushes the skin away from the meat, insulating the interior from overcooking, and again allowing the skin to crisp.
How can we replicate some of the flavor and texture and deep frying on the grill? Like all things grilled, hundreds, perhaps thousands of recipes abound. Some suggest marinating overnight in buttermilk. Others dredging in cornstarch. Or, first boiling in water to remove some of the fat and par cook the meat1. I've tried a number of approaches, and in the end come down on the side of simplicity. But, even simplicity requires practice, because great wings are a matter of great grill technique. Preparing the wings couldn't be easier. Rinse the wings under water, pat dry and dust on a mixture of salt and baking soda. I use 1/4 -1/2 tsp of table salt for every pound of wings, plus a little baking soda (a 4:1 ratio of salt to baking soda). Premix a larger quantity to make it easier to measure, and store in a jar until the urge for wings strikes). Why salt and baking soda? Well, the salt adds flavor of course, but it also helps the meat retain moisture during cooking, by electrostatically binding water to muscle. The baking soda performs two functions- first, it's alkaline, and high pH kicks off the Maillard reaction that is the scientific name for a cascade of browning steps. When heated, the baking soda also forms small carbon dioxide bubbles which help lift the skin off the meat. First Step- you are adding a small amount of salt+soda to a large amount of wings. Do this in four passes. Place the wings in a bowl and drop a quarter of the salt mixture from a height so it spreads out evenly. Toss and repeat three times. With clean hands or gloves, massage in. Now, spread out on a rack and refrigerate uncovered for about 2 hours. This gives the salt time to diffuse through the skin into the meat, and for the skin to dry out. Just before cooking, lightly drizzle with oil and toss to evenly coat. Second Step- rendering. You will need to set up the grill so one section cooks indirectly (i.e. like a kitchen oven), and the other cooks rapidly and hot over the grates. AmazingRibs.com offers sound advice on grill set-up. Place the wings over the indirect section, which should be around 325F. On a gas grill with an internal high shelf, you should set the wings on the shelf and use a digital thermometer ON THE LEVEL OF THE SHELF to measure the temperature. Then let the wings cook, flipping every ten minutes or so. The skin will bubble and render fat, and they are ready for the next step when the pasty white skin turns a darkened yellow or light brown. Depending on the grill and the size of your wings, this step might take a half hour. Now, "wings" come in two large parts- the drumstick and the flats. Obviously, the drumsticks will take longer to cook. Either start the drumsticks 10 minutes before the flats, or pull the flats off the heat as they individually reach light brown. Look at each wing as an individual meal- flip when needed to even out the color, remove early if necessary. At the end of the indirect step, they should all be equally browned. Third Step- hot grilling. Now crank up a portion of the grill to high- around 550F is ideal (700F is good for steaks, but a little too hot for wings which will char). Place the wings on the grill, let sit for a few minutes, flip and repeat. Sometimes one side will take longer than another to brown- this is normal. The "technique" part is to LOOK while cooking and ease each wing to the same state of perfection- a medium brown skin, with grill marks. If some finish early, place on a cool section of the grill. Nothing worse than serving a rubbery wing. The hot grilling step might take an additional 15 minutes, again depending on the grill and the uniformity of the chicken. Saucing- Let your imagination go wild. There is the traditional hot sauce, or barbecue sauce. We also like to use teriyaki, and sometimes chimichurri sauce. Simply our over the wings while hot, and toss. You can also prepare wings in your oven, substituting the broiler for the hot grill step. The only problem is it may be hard to cook each wing individually in an oven- the sight lines are poor and its hard to use the tongs without constantly opening the oven and sliding out the tray. But wings done right are delicious. Enjoy!
|
|
-------------------------------------------------------------------------------------------------------- Additional articles on kitchen science can be found HERE.
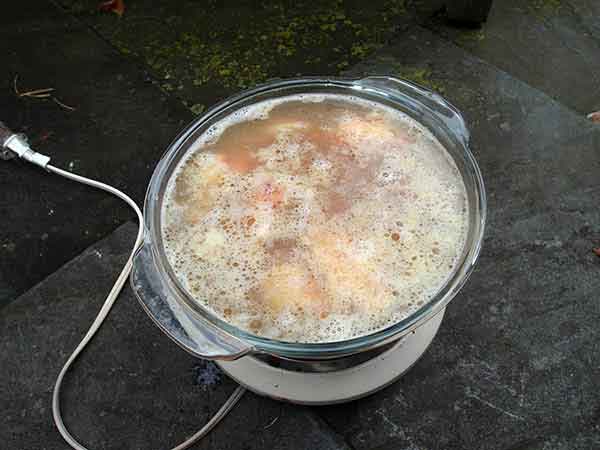
1 In testing various wing recipes, sometime you have to go to the extremes to find the middle. So, rather than boiling in water and dusting with a gentle alkaline like baking soda, I tried boiling in a solution of lye (NaOH). BOILING LYE IS VERY DANGEROUS- DO NOT TRY THIS AT HOME! I prepared a 2% lye solution, and simmered the wings for 15 minutes. This is a very effective way to render out the fat. The skin puffed up, and the water was filled with a slurry of gelatinous grease:
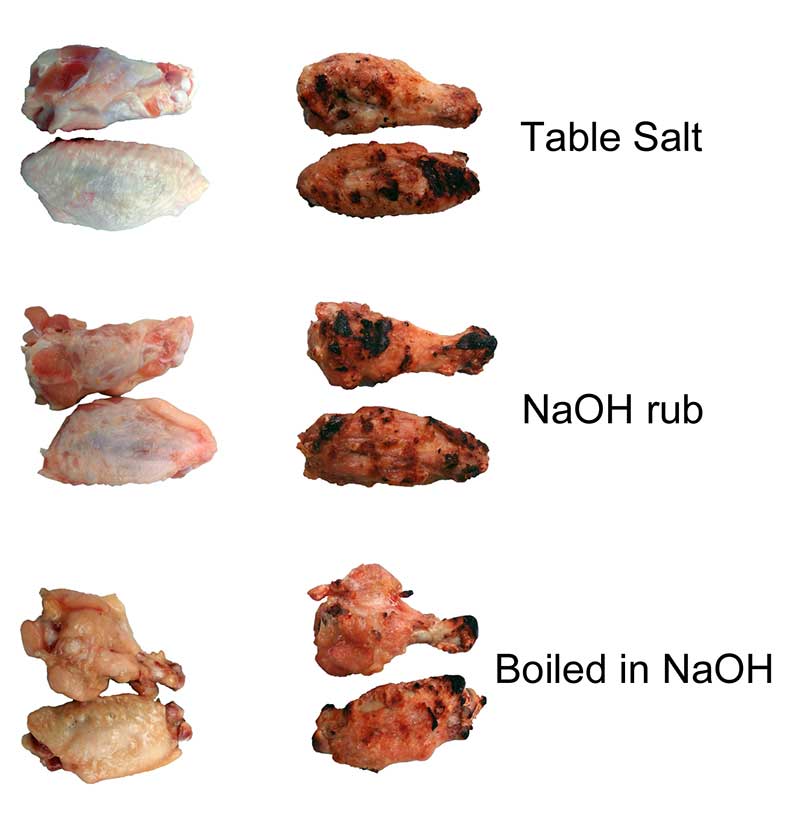
For comparison, I also dry rubbed the wings with NaOH (1/4 tsp per pound), and also prepared my standard recipe of salt and baking soda. After grilling, the lye boiled wings were very crispy- almost as crispy as deep fried, with the lye and the salt-rubbed coming in second. All wings were tender (that's more a function of grill technique), and you can see how the meat on the lye-boiled drumstick has pulled back and off the bone.
How did they taste? Well, the NaOH prepared wings tasted a little "flat", but not metallic (as can happen with salt substitutes like potassium chloride). A little bit of table salt removed this flat flavor. The skin was crispy. But my salt recipe wings were also delicious, and tasted like chicken. And, once you sauce the wings, any differences disappear. So the extreme teaches us the middle road is sometimes best.
|
 Contact Greg Blonder by email here - Modified Genuine Ideas, LLC. |